
- A+
Brother MFCJ220 Ink Pad Replacement
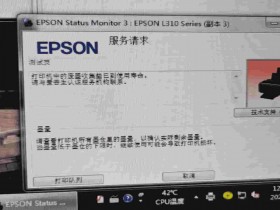
Brother MFCJ220 is a popular all-in-one inkjet printer that is widely used in homes and small offices. However, like every other printer, it has a maintenance issue that needs to be addressed from time to time - the ink pad replacement. The ink pad is a sponge-like material located at the bottom of the printer that absorbs the excess ink from the printer during the printing process. When it becomes saturated, it can no longer perform its function, leading to ink smudging and other printing issues. In this article, we will be discussing how to replace the ink pad on your Brother MFCJ220 printer.
Why Replace the Ink Pad?
Before we jump into the steps involved in replacing the ink pad, it's important to understand why you need to replace it. The ink pad is an essential part of the printer's maintenance system, without which your prints can be impacted. When the ink pad reaches its saturation point, the excess ink starts to accumulate inside the printer. This can lead to ink smudging, ink leakage, and even paper jams. Additionally, a printer with a full ink pad may stop printing altogether until the ink pad is replaced.
Steps to Replace the Ink Pad
Replacing the ink pad on your Brother MFCJ220 is a relatively simple process that can be completed in a few steps.
Step 1: Turn off the Printer
Before you begin the ink pad replacement process, turn off your printer and unplug it from the power source. This is to ensure that you don't accidentally turn the printer on while replacing the ink pad.
Step 2: Open the Printer Cover
Next, open the printer cover to access the ink cartridges and other internal parts of the printer. In the Brother MFCJ220 printer, you can access the ink pad by lifting the scanner cover.
Step 3: Remove the Old Ink Pad
Once you've accessed the ink pad, remove it from the printer. The ink pad is situated at the bottom of the printer and may require some force to lift out. You can use a flat tool or a screwdriver to lift it out of place. Once you've removed the old ink pad, dispose of it properly.
Step 4: Install the New Ink Pad
Take the new ink pad and install it in the same spot where you removed the old one. Ensure that it's seated correctly before moving on to the next step.
Step 5: Reset the Ink Pad Counter
After installing the new ink pad, you need to reset the ink pad counter. This is a feature that tracks the ink pad's usage and alerts the printer when it's time for a replacement. To reset the counter, press and hold the "Menu" button on your printer's control panel until you see "Maintenance" on the display. Use the arrow keys to navigate to "Ink" and press "Set". Next, navigate to "Ink Pad" and press "Set". Finally, select "Yes" and press "Set" to reset the ink pad counter.
Step 6: Close the Printer Cover
Close the printer cover and turn the printer back on. Your Brother MFCJ220 printer is now ready to use, with a new ink pad in place.
Conclusion
Replacing the ink pad on your Brother MFCJ220 printer is an essential maintenance activity that ensures your printer runs smoothly and efficiently. With the steps outlined in this article, you can effortlessly replace your ink pad and avoid any printing issues caused by a clogged ink pad. Remember to reset the ink pad counter after replacing the ink pad and dispose of the old one properly. Happy printing!