
- A+
The Epson R330 Waste Ink Cleaning Guide in English
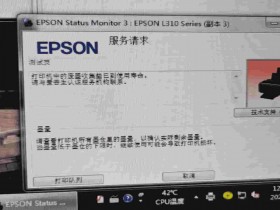
The Epson R330 printer is a high-quality inkjet printer designed to deliver excellent print quality. Like any other printer, it comes with a few challenges that users may face. One of the most common problems that users encounter is the accumulation of waste ink, which can lead to the printer malfunctioning. Waste ink is generated when the printer goes through its cleaning cycles, and it ends up in an internal waste ink tank. When this tank is full, the printer will give you an error message. This article provides a step-by-step guide on how to clean your Epson R330 printer waste ink.
Step 1: Prepare your printer for the cleaning process
The first step is to prepare your printer for the cleaning process. Ensure that your printer is switched on and plugged into a power source. Next, check the ink level and refill where necessary. It is also vital to take out all the paper from the printer before commencing the cleaning process.
Step 2: Enter the waste ink pad counter reset mode
The next step is to reset the counter. To do this, press and hold the 'Resume' button and, while holding it down, press the 'Power' button. Keep holding both buttons until you see a message on the printer screen that says 'Reset waste ink pad counter.' Once you see this message, release the 'Resume' button and press it twice. The second press should be longer than the first one.
Step 3: Use the Epson Adjustment Program
Download and install the Epson Adjustment program on your computer. This program is essential in resetting the waste ink counter. Once you have installed it, connect your printer to your computer and select the 'Epson R330' model from the drop-down arrow in the program. You can then select the 'Waste ink pad counter' option and click 'Ok.
Step 4: Clean the waste ink pad
Now that the counter has been reset, proceed to clean your printer's waste ink pad. To do this, find the waste ink pad and carefully remove it. Wash the pad gently in warm water and let it dry under the sun for a few hours. Ensure that it is completely dry before inserting it back into the printer. Once it's dry, insert it back into your Epson R330 printer.
Step 5: Replace the absorbent pad
Place an absorbent pad under the printer's waste ink tank to collect any ink spills and avoid damaging your printer. You can use a piece of paper towel or any other absorbent material. Before you put the casing cover back, check and clean the capping station, which is around the ink cartridges, to avoid causing any ink smears on your paper.
Step 6: Test your printer
After completing all the steps, it's essential to test your printer. Load some paper into the printer and print a sample page to ensure that everything is working correctly. If the printer is working fine, give yourself a pat on the back for successfully cleaning your Epson R330 printer waste ink.
Conclusion
Cleaning your Epson R330 printer waste ink is not difficult, but it requires patience and careful handling. It is essential to follow the steps provided in this guide to avoid damaging your printer. Remember to reset the waste ink counter using the Epson Adjustment program before cleaning the waste ink pad. If you encounter any challenges during the process, seek professional help to prevent damaging your printer.